") 不會(huì)吧,不會(huì)有人2021還在使用虛擬機(jī)吧!
不會(huì)吧,不會(huì)有人2021還在使用虛擬機(jī)吧!

Win10安裝Ubuntu子系統(tǒng)及圖形化界面詳細(xì)教程(WSL)
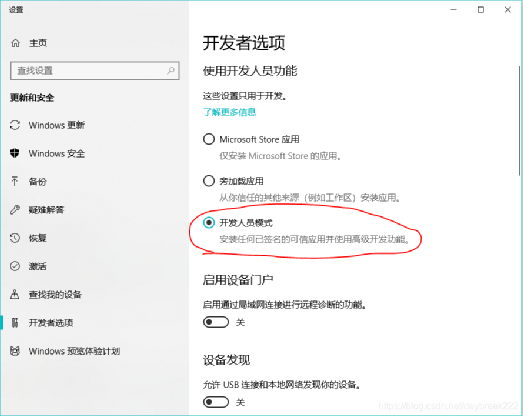
在準(zhǔn)備進(jìn)行安裝之前,推薦C盤上至少有5G的空余空間。1 win10設(shè)置打開兩個(gè)設(shè)置:1.開發(fā)人員模式:
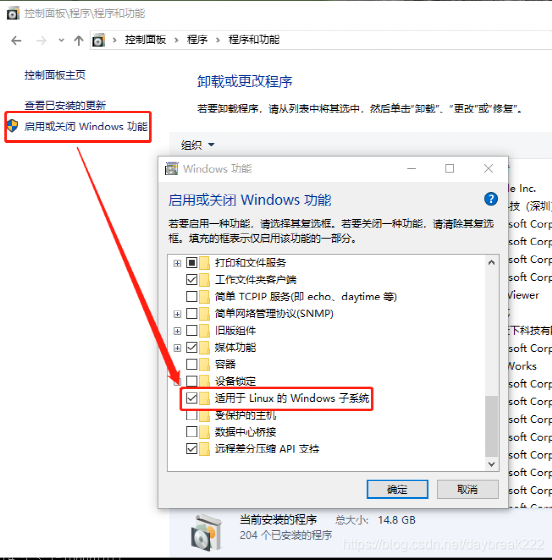
2.啟用子系統(tǒng)功能
2 安裝打開Microsoft Store,搜索Ubuntu,出現(xiàn)如下界面:
選擇我紅框框出來的兩個(gè)版本,不要選第一個(gè),那個(gè)有坑(目前還有20.04版本)。安裝速度還是挺快的。安裝完了之后會(huì)在開始菜單出現(xiàn)linux的bash:
打開之后還需要繼續(xù)安裝一小會(huì),然后輸入用戶名和密碼,這個(gè)就是以后登錄ubuntu的用戶名和密碼了。3 Linux安裝位置以我安裝的Ubuntu18.04為例,Linux安裝在路徑:C:UsersHPAppDataLocalPackagesCanonicalGroupLimited.Ubuntu18.04onWindows_79rhkp1fndgscLocalState ootfs不同的Ubuntu版本路徑稍有不同,但是都是Canonical這個(gè)開頭的。這里可以直接看到Ubuntu子系統(tǒng)中的文件內(nèi)容,大部分情況下文件可以直接修改。4 換源-Ubuntu18.04安裝好系統(tǒng)之后,第一件事情就是換源,換源,換源!這里把鏡像換成國內(nèi)的阿里源,另外清華的源也是不錯(cuò)的。
1、阿里源:
deb http://mirrors.aliyun.com/ubuntu/ bionic main restricted universe multiversedeb http://mirrors.aliyun.com/ubuntu/ bionic-security main restricted universe multiversedeb http://mirrors.aliyun.com/ubuntu/ bionic-updates main restricted universe multiversedeb http://mirrors.aliyun.com/ubuntu/ bionic-proposed main restricted universe multiversedeb http://mirrors.aliyun.com/ubuntu/ bionic-backports main restricted universe multiversedeb-src http://mirrors.aliyun.com/ubuntu/ bionic main restricted universe multiversedeb-src http://mirrors.aliyun.com/ubuntu/ bionic-security main restricted universe multiversedeb-src http://mirrors.aliyun.com/ubuntu/ bionic-updates main restricted universe multiversedeb-src http://mirrors.aliyun.com/ubuntu/ bionic-proposed main restricted universe multiversedeb-src http://mirrors.aliyun.com/ubuntu/ bionic-backports main restricted universe multiverse
2、中科大源:
deb https://mirrors.ustc.edu.cn/ubuntu/ bionic main restricted universe multiversedeb-src https://mirrors.ustc.edu.cn/ubuntu/ bionic main restricted universe multiversedeb https://mirrors.ustc.edu.cn/ubuntu/ bionic-updates main restricted universe multiversedeb-src https://mirrors.ustc.edu.cn/ubuntu/ bionic-updates main restricted universe multiversedeb https://mirrors.ustc.edu.cn/ubuntu/ bionic-backports main restricted universe multiversedeb-src https://mirrors.ustc.edu.cn/ubuntu/ bionic-backports main restricted universe multiversedeb https://mirrors.ustc.edu.cn/ubuntu/ bionic-security main restricted universe multiversedeb-src https://mirrors.ustc.edu.cn/ubuntu/ bionic-security main restricted universe multiversedeb https://mirrors.ustc.edu.cn/ubuntu/ bionic-proposed main restricted universe multiversedeb-src https://mirrors.ustc.edu.cn/ubuntu/ bionic-proposed main restricted universe multiverse
3、清華源:
deb https://mirrors.tuna.tsinghua.edu.cn/ubuntu/ bionic main restricted universe multiversedeb-src https://mirrors.tuna.tsinghua.edu.cn/ubuntu/ bionic main restricted universe multiversedeb https://mirrors.tuna.tsinghua.edu.cn/ubuntu/ bionic-updates main restricted universe multiversedeb-src https://mirrors.tuna.tsinghua.edu.cn/ubuntu/ bionic-updates main restricted universe multiversedeb https://mirrors.tuna.tsinghua.edu.cn/ubuntu/ bionic-backports main restricted universe multiversedeb-src https://mirrors.tuna.tsinghua.edu.cn/ubuntu/ bionic-backports main restricted universe multiversedeb https://mirrors.tuna.tsinghua.edu.cn/ubuntu/ bionic-security main restricted universe multiversedeb-src https://mirrors.tuna.tsinghua.edu.cn/ubuntu/ bionic-security main restricted universe multiversedeb https://mirrors.tuna.tsinghua.edu.cn/ubuntu/ bionic-proposed main restricted universe multiversedeb-src https://mirrors.tuna.tsinghua.edu.cn/ubuntu/ bionic-proposed main restricted universe multiverse
二、更新源1、備份之前的源
cp /etc/apt/sources.list /etc/apt/sources.list.bak
任選上面的一個(gè)源 寫入到/etc/apt/sources.list文件中 最后更新源和軟件:
sudo apt-get updatesudo apt-get upgrade
5 安裝圖形化界面我曾經(jīng)用xfce4+VNC的方法試過,但是這種方法在我重啟電腦之后就出了問題,后來就沒有再管,另外xfce的桌面實(shí)在是不太友好,terminal里粘貼都很費(fèi)勁,所以后來我用了VcXsrv的方式安裝GUI。5.1 安裝VcXsrvVcXsrv是一個(gè)免費(fèi)開源的軟件,并且在SourceForget上評(píng)價(jià)也不錯(cuò),下載地址為https://sourceforge.net/projects/vcxsrv/下載后安裝,打開XLaunch,選擇:“one large window”,Display number設(shè)置成0,其它默認(rèn)即可,一路下一步
一路到最后一步,推薦大家點(diǎn)個(gè)保存,要不然每次打開XLaunch都要重新設(shè)置一遍:
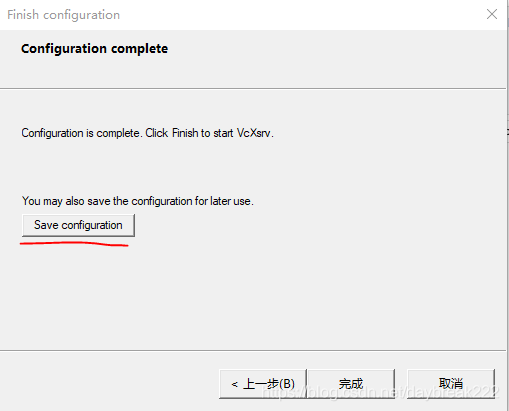
可以保存到桌面,下次打開的時(shí)候,直接點(diǎn)桌面上保存的文件就可以了: 5.2 Ubuntu內(nèi)安裝桌面環(huán)境
sudo apt-get install ubuntu-desktop unity compizconfig-settings-manager
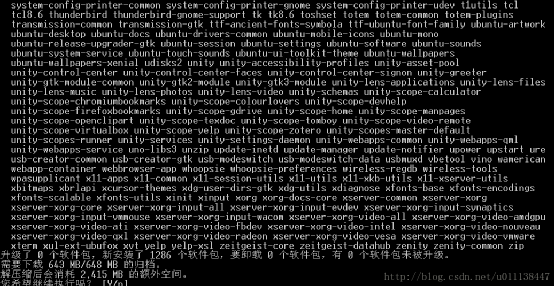
三個(gè)包比較大,要等一段時(shí)間(有評(píng)論的朋友說這個(gè)下的特別慢,拋開網(wǎng)速的問題,可能是換源沒成功吧?)
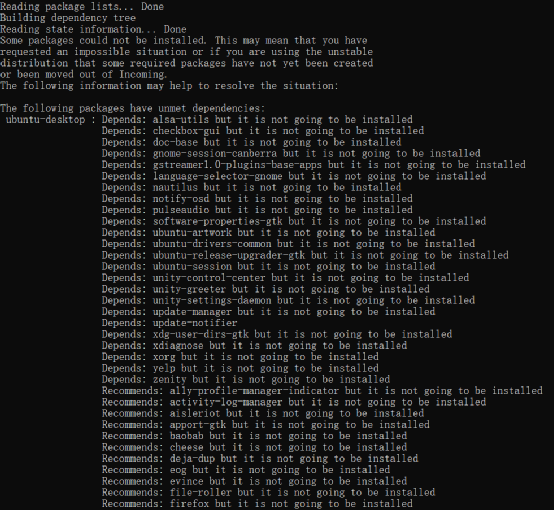
出現(xiàn)上圖的原因:1、換源沒成功;2、換的源和系統(tǒng)版本(Ubuntu18.04或者20.04)不匹配,度娘搜索和自己系統(tǒng)匹配的,上節(jié)針對(duì)的是18.04。需要提醒的是,咱們這樣折騰,是要玩一票大的,所以,請(qǐng)有點(diǎn)*數(shù),硬盤啊,網(wǎng)絡(luò)啊,啥啥啥的,都腦門清醒點(diǎn):下載650M,解壓后近2.4G
然后配置顯示方式:
export DISPLAY=localhost:0
#執(zhí)行下面這條命令之前,確保你上一步的XLaunch是開著的并且配置好了
ccsm
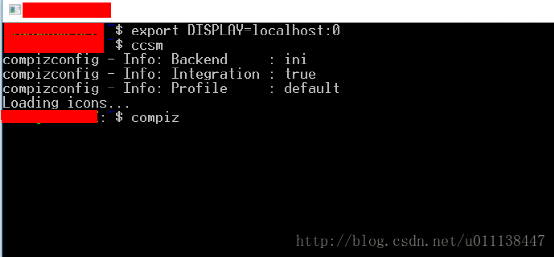
在X-windows中,即會(huì)彈出ccsm的配置界面,(只需要勾選Desktop中的Ubuntu Unity Plugin即可,其它默認(rèn)就好)
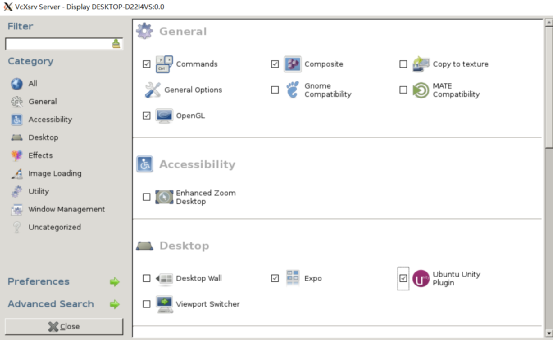

然后close即可5.3開啟桌面
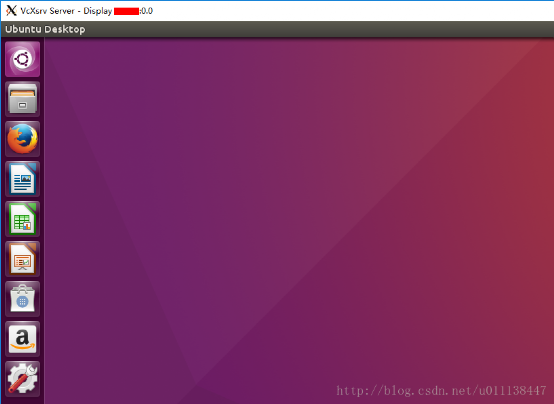
sudo compiz
輸入上面這條命令,就可以在XLaunch上看到桌面了,我的電腦打開之后字體有點(diǎn)怪,弄了很久也沒弄好,故放棄了。。.
注:我卸載了好多ubuntu桌面自帶的軟件,因?yàn)楫吘故亲酉到y(tǒng),越輕巧越好,其他的任務(wù)可以直接在windows上完成,因此我把libreoffice、Firefox、thunderbrid還有一些游戲什么的都卸載了5.4 One more thing每次重啟電腦之后,想繼續(xù)看到桌面的話,直接打開配置好的XLaunch還是不夠的,每次還需要輸入如下兩條命令:
export DISPLAY=localhost:0sudo compiz
因此,可以把這兩條命令保存下來寫到.sh文件里,如上圖所示,這樣每次只要運(yùn)行一下這個(gè)腳本就能直接看到桌面了6 硬盤上其他的文件在哪 因?yàn)槭亲酉到y(tǒng),在windows上可以看到linux的文件,那么同理在linux上也能看到windows的文件。在Ubuntu下,其他的盤路徑在“/mnt”下面:
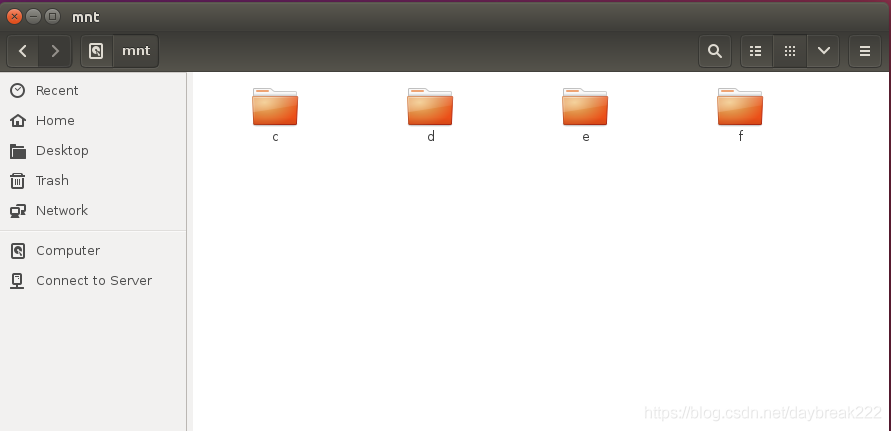
為了方便后續(xù)使用,可以在桌面上生成一個(gè)快捷方式,以E盤為例,打開terminal輸入:
# sudo ln -sT [文件夾路徑] [桌面文件夾路徑]
sudo ln -sT /mnt/e /home/usrName/Desktop/E #usrName換成你的用戶名
桌面上就會(huì)有E盤的快捷方式了,其他文件夾同理
編輯:jq
-
WINDOWS
+關(guān)注
關(guān)注
4文章
3614瀏覽量
91441 -
C盤
+關(guān)注
關(guān)注
0文章
21瀏覽量
3806
原文標(biāo)題:1202年了,還在使用虛擬機(jī)嗎?Win10安裝Ubuntu子系統(tǒng)及圖形化界面詳細(xì)教程
文章出處:【微信號(hào):Open_FPGA,微信公眾號(hào):OpenFPGA】歡迎添加關(guān)注!文章轉(zhuǎn)載請(qǐng)注明出處。
發(fā)布評(píng)論請(qǐng)先 登錄
如果主節(jié)點(diǎn)使用AD2433,從節(jié)點(diǎn)使用AD2428,會(huì)不會(huì)有什么風(fēng)險(xiǎn)點(diǎn)?
使用DLPC4422+DLP650NE+三色LED,原理設(shè)計(jì)DLPC4422的LMPSTAT這個(gè)管腳懸空未接,會(huì)不會(huì)有什么影響?
hyper 備份,Hyper備份:虛擬機(jī)備份與恢復(fù)
ADC12D1000Vcmo工作在輸出模式,如果接地了會(huì)不會(huì)有問題?
DDC112U的clk和conv信號(hào)一定要同步嘛,不同步會(huì)不會(huì)有問題?
虛擬化數(shù)據(jù)恢復(fù)—XenServer虛擬機(jī)數(shù)據(jù)恢復(fù)案例
虛擬化數(shù)據(jù)恢復(fù)——Hyper-V虛擬機(jī)數(shù)據(jù)恢復(fù)案例
虛擬機(jī)數(shù)據(jù)恢復(fù)—異常斷電導(dǎo)致XenServer虛擬機(jī)不可用的數(shù)據(jù)恢復(fù)案例
虛擬化數(shù)據(jù)恢復(fù)—異常斷電導(dǎo)致VMware虛擬機(jī)文件丟失的數(shù)據(jù)恢復(fù)案例
差分儀表運(yùn)放的電阻電容混接會(huì)不會(huì)有問題?
虛擬化數(shù)據(jù)恢復(fù)—EXSI虛擬機(jī)誤還原快照如何恢復(fù)數(shù)據(jù)?

什么是虛擬機(jī)?什么是虛擬化?
一個(gè)基準(zhǔn)源同時(shí)作為15個(gè)相同的OPA277的輸入,會(huì)不會(huì)有問題?
創(chuàng)建ubuntu虛擬機(jī)
虛擬機(jī)數(shù)據(jù)恢復(fù)—KVM虛擬機(jī)被誤刪除的數(shù)據(jù)恢復(fù)案例


 工商網(wǎng)監(jiān)
評(píng)論