") 如何使用OpenCV測(cè)量圖像中物體間距離
如何使用OpenCV測(cè)量圖像中物體間距離

計(jì)算物體之間的距離與計(jì)算圖像中物體的大小算法思路非常相似——都是從參考對(duì)象開始的。我們將使用0.25美分作為我們的參考對(duì)象,它的寬度為0.955英寸。
并且我們還將0.25美分總是放在圖片最左側(cè)使其容易識(shí)別。這樣它就滿足了我們上面提到的參考對(duì)象的兩個(gè)特征。

我們的目標(biāo)是找到0.25美分,然后利用0.25美分的尺寸來測(cè)量0.25美分硬幣與所有其他物體之間的距離。
定義參考對(duì)象并計(jì)算距離
打開一個(gè)新文件,將其命名為distance_between.py,插入以下代碼:
# import the necessary packages
from scipy.spatial import distance as dist
from imutils import perspective
from imutils import contours
import numpy as np
import argparse
import imutils
import cv2
def midpoint(ptA, ptB):
return ((ptA[0] + ptB[0]) * 0.5, (ptA[1] + ptB[1]) * 0.5)
# construct the argument parse and parse the arguments
ap = argparse.ArgumentParser()
ap.add_argument("-i", "--image", required=True,
  help="path to the input image")
ap.add_argument("-w", "--width", type=float, required=True,
  help="width of the left-most object in the image (in inches)")
args = vars(ap.parse_args())
我們這里的代碼與上周的代碼幾乎相同。我們從在第2-8行上導(dǎo)入所需的Python包開始。
第12-17行解析命令行參數(shù)。這里我們需要兩個(gè)參數(shù):——image,它是包含我們想要測(cè)量的對(duì)象的輸入圖像的路徑,以及——width,為我們參考對(duì)象的寬度(單位為英寸)。
接下來,我們需要對(duì)圖像進(jìn)行預(yù)處理:
# load the image, convert it to grayscale, and blur it slightly
image = cv2.imread(args["image"])
gray = cv2.cvtColor(image, cv2.COLOR_BGR2GRAY)
gray = cv2.GaussianBlur(gray, (7, 7), 0)
# perform edge detection, then perform a dilation + erosion to
# close gaps in between object edges
edged = cv2.Canny(gray, 50, 100)
edged = cv2.dilate(edged, None, iterations=1)
edged = cv2.erode(edged, None, iterations=1)
# find contours in the edge map
cnts = cv2.findContours(edged.copy(), cv2.RETR_EXTERNAL,
  cv2.CHAIN_APPROX_SIMPLE)
cnts = imutils.grab_contours(cnts)
# sort the contours from left-to-right and, then initialize the
# distance colors and reference object
(cnts, _) = contours.sort_contours(cnts)
colors = ((0, 0, 255), (240, 0, 159), (0, 165, 255), (255, 255, 0),
  (255, 0, 255))
refObj = None
第2-4行從磁盤加載圖像,將其轉(zhuǎn)換為灰度圖,然后使用7 x 7內(nèi)核的高斯濾波器對(duì)其進(jìn)行模糊降噪。
當(dāng)我們的圖像被模糊后,我們應(yīng)用Canny邊緣檢測(cè)器來檢測(cè)圖像中的邊緣,然后進(jìn)行膨脹+腐蝕來縮小邊緣圖中的縫隙(第7-9行)。
調(diào)用cv2.findContours檢測(cè)邊緣圖中對(duì)象的輪廓(第11-13行),而第16行從左到右對(duì)輪廓進(jìn)行排序。由于我們知道0.25美分(即參考對(duì)象)將始終是圖像中最左邊,因此從左到右對(duì)輪廓進(jìn)行排序可以確保與參考對(duì)象對(duì)應(yīng)的輪廓始終是cnts列表中的第一個(gè)。
然后,我們初始化用于繪制距離的colors列表以及refObj變量,該變量將存儲(chǔ)參考對(duì)象的邊界框、質(zhì)心和pixels-per-metric值(看上一篇就明白pixels-per-metric的具體定義,其實(shí)就是參考對(duì)象的實(shí)際大小(單位英寸)與圖片中的寬度(單位為像素)的比值)。
# loop over the contours individually
for c in cnts:
  # if the contour is not sufficiently large, ignore it
if cv2.contourArea(c) < 100:
continue
  # compute the rotated bounding box of the contour
box = cv2.minAreaRect(c)
box = cv2.cv.BoxPoints(box) if imutils.is_cv2() else cv2.boxPoints(box)
box = np.array(box, dtype="int")
  # order the points in the contour such that they appear
  # in top-left, top-right, bottom-right, and bottom-left
  # order, then draw the outline of the rotated bounding
  # box
box = perspective.order_points(box)
  # compute the center of the bounding box
cX = np.average(box[:, 0])
cY = np.average(box[:, 1])
在第2行,我們開始對(duì)cnts列表中的每個(gè)輪廓進(jìn)行循環(huán)。如果輪廓比較小(第4和5行),我們認(rèn)為是噪聲并忽略它。
然后,第7-9行計(jì)算當(dāng)前對(duì)象的最小旋轉(zhuǎn)包圍框。
第14行上調(diào)用order_points函數(shù)(此系列第一篇定義的函數(shù))來對(duì)矩形框四個(gè)頂點(diǎn)以左上角、右上角、右下角和左下角的順序排列,我們將看到,在計(jì)算物體之間的距離時(shí),這一點(diǎn)非常重要。
第16行和第17行通過取邊界框在x和y方向上的平均值來計(jì)算旋轉(zhuǎn)后的邊界框的中心(x, y)坐標(biāo)。
下一步是校準(zhǔn)我們的refObj:
# if this is the first contour we are examining (i.e.,
# the left-most contour), we presume this is the
# reference object
if refObj is None:
# unpack the ordered bounding box, then compute the
# midpoint between the top-left and top-right points,
# followed by the midpoint between the top-right and
# bottom-right
    (tl, tr, br, bl) = box
    (tlblX, tlblY) = midpoint(tl, bl)
    (trbrX, trbrY) = midpoint(tr, br)
# compute the Euclidean distance between the midpoints,
# then construct the reference object
    D = dist.euclidean((tlblX, tlblY), (trbrX, trbrY))
    refObj = (box, (cX, cY), D / args["width"])
continue
如果refObj為None(第4行),則需要對(duì)其進(jìn)行初始化。
我們首先獲取(排序后的)最小旋轉(zhuǎn)邊界框坐標(biāo),并分別計(jì)算四個(gè)頂點(diǎn)之間的中點(diǎn)(第10-15行)。
然后計(jì)算中點(diǎn)之間的歐氏距離,給出我們的“像素/尺寸”比例,來確定一英寸為多少像素寬度。
最后,我們將refObj實(shí)例化為一個(gè)3元組,包括:
物體對(duì)象的最小旋轉(zhuǎn)矩形對(duì)象box
參考對(duì)象的質(zhì)心。
像素/寬度比例,我們將用其來結(jié)合物體之間的像素距離來確定物體之間的實(shí)際距離。
下一個(gè)代碼塊負(fù)責(zé)繪制參考對(duì)象和當(dāng)前檢查對(duì)象的輪廓,然后定義變量refCoords和objCoords,這樣(1)最小包圍矩陣坐標(biāo)和(2)質(zhì)心的(x, y)坐標(biāo)都包含在同一個(gè)數(shù)組中:
# draw the contours on the image
orig = image.copy()
  cv2.drawContours(orig, [box.astype("int")], -1, (0, 255, 0), 2)
  cv2.drawContours(orig, [refObj[0].astype("int")], -1, (0, 255, 0), 2)
# stack the reference coordinates and the object coordinates
# to include the object center
  refCoords = np.vstack([refObj[0], refObj[1]])
  objCoords = np.vstack([box, (cX, cY)])
現(xiàn)在我們可以開始計(jì)算圖像中各個(gè)物體的質(zhì)心和質(zhì)心之間的距離了:
# loop over the original points
for ((xA, yA), (xB, yB), color) in zip(refCoords, objCoords, colors):
# draw circles corresponding to the current points and
# connect them with a line
    cv2.circle(orig, (int(xA), int(yA)), 5, color, -1)
    cv2.circle(orig, (int(xB), int(yB)), 5, color, -1)
    cv2.line(orig, (int(xA), int(yA)), (int(xB), int(yB)),
      color, 2)
# compute the Euclidean distance between the coordinates,
# and then convert the distance in pixels to distance in
# units
    D = dist.euclidean((xA, yA), (xB, yB)) / refObj[2]
    (mX, mY) = midpoint((xA, yA), (xB, yB))
    cv2.putText(orig, "{:.1f}in".format(D), (int(mX), int(mY - 10)),
      cv2.FONT_HERSHEY_SIMPLEX, 0.55, color, 2)
# show the output image
    cv2.imshow("Image", orig)
    cv2.waitKey(0)
在第2行,我們開始對(duì)圖片中物體對(duì)象的頂點(diǎn)(x, y)坐標(biāo)進(jìn)行循環(huán)。
然后我們畫一個(gè)圓表示我們正在計(jì)算距離的當(dāng)前點(diǎn)坐標(biāo),并畫一條線連接這些點(diǎn)(第5-7條線)。
然后,第12行計(jì)算參考位置和對(duì)象位置之間的歐式距離,然后除以“像素/度量”,得到兩個(gè)對(duì)象之間的實(shí)際距離(以英寸為單位)。然后在圖像上標(biāo)識(shí)出計(jì)算的距離(第13-15行)。
距離測(cè)量結(jié)果
下面是一個(gè)GIF動(dòng)畫,演示了我們的程序運(yùn)行效果:
在每種情況下,我們的腳本都匹配左上(紅色)、右上(紫色)、右下(橙色)、左下(藍(lán)綠色)和質(zhì)心(粉色)坐標(biāo),然后計(jì)算參考對(duì)象和當(dāng)前對(duì)象之間的距離(以英寸為單位)。
注意圖像中的兩個(gè)0.25美分完全平行,這意味著所有五個(gè)頂點(diǎn)之間的距離均為6.1英寸。
下面是第二個(gè)例子,這次計(jì)算的是參考對(duì)象和藥丸之間的距離:
這個(gè)例子可以作為藥片分類機(jī)器人的輸入,自動(dòng)獲取一組藥片,并根據(jù)它們的大小和與藥片容器的距離來組織它們。
最后一個(gè)例子計(jì)算了我們的參考對(duì)象(一張3.5英寸x 2英寸的名片)和一組7英寸的黑膠唱片和信封之間的距離:
編輯:黃飛
-
OpenCV
+關(guān)注
關(guān)注
32文章
642瀏覽量
42878
原文標(biāo)題:使用OpenCV測(cè)量圖像中物體之間的距離
文章出處:【微信號(hào):vision263com,微信公眾號(hào):新機(jī)器視覺】歡迎添加關(guān)注!文章轉(zhuǎn)載請(qǐng)注明出處。
發(fā)布評(píng)論請(qǐng)先 登錄
使用Python和OpenCV查找從相機(jī)到物體/標(biāo)記的距離
使用Labview vision來搜索圖像中的物體
【芯靈思A83T試用申請(qǐng)】嵌入式視覺--遠(yuǎn)距離物體跟蹤與定位
CCD圖像測(cè)量系統(tǒng)的組成
AD軟件中點(diǎn)對(duì)點(diǎn)的測(cè)量距離 邊緣與邊緣間距的測(cè)量方法介紹
如何使用OpenCV訪問Mat圖像中每個(gè)像素的值
OpenCV中的圖像的計(jì)算
簡(jiǎn)述我們?cè)撊绾问褂?b class='flag-5'>OpenCV測(cè)量圖像中物體之間的距離
關(guān)于一種新的遠(yuǎn)距離測(cè)量高溫物體的方案
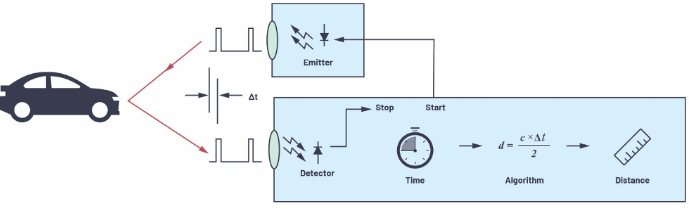
用于距離測(cè)量和物體檢測(cè)的飛行時(shí)間系統(tǒng)
使用OpenCV實(shí)現(xiàn)目標(biāo)物體到相機(jī)的距離測(cè)量
用于距離測(cè)量和物體檢測(cè)的飛行時(shí)間系統(tǒng)
使用超聲波測(cè)距儀測(cè)量到物體的距離

OpenCV庫(kù)在圖像處理和深度學(xué)習(xí)中的應(yīng)用
晶面間距測(cè)量(上期)
- 設(shè)計(jì)技術(shù)
- 可編程邏輯
- 電源/新能源
- MEMS/傳感技術(shù)
- 測(cè)量?jī)x表
- 嵌入式技術(shù)
- 制造/封裝
- 模擬技術(shù)
- RF/無線
- 接口/總線/驅(qū)動(dòng)
- 處理器/DSP
- EDA/IC設(shè)計(jì)
- 存儲(chǔ)技術(shù)
- 光電顯示
- EMC/EMI設(shè)計(jì)
- 連接器
- 行業(yè)應(yīng)用
- LEDs
- 汽車電子
- 音視頻及家電
- 通信網(wǎng)絡(luò)
- 醫(yī)療電子
- 人工智能
- 虛擬現(xiàn)實(shí)
- 可穿戴設(shè)備
- 機(jī)器人
- 安全設(shè)備/系統(tǒng)
- 軍用/航空電子
- 移動(dòng)通信
- 工業(yè)控制
- 便攜設(shè)備
- 觸控感測(cè)
- 物聯(lián)網(wǎng)
- 智能電網(wǎng)
- 區(qū)塊鏈
- 新科技
- 特色內(nèi)容
- 專欄推薦
- 學(xué)院
- 設(shè)計(jì)資源
- 設(shè)計(jì)技術(shù)
- 電子百科
- 電子視頻
- 元器件知識(shí)
- 工具箱
- VIP會(huì)員
- 最新技術(shù)文章
- 產(chǎn)品地圖
- 品牌地圖
- 社區(qū)
- 小組
- 論壇
- 問答
- 評(píng)測(cè)試用
- 企業(yè)服務(wù)
- 產(chǎn)品
- 資料
- 文章
- 方案
- 企業(yè)
- 供應(yīng)鏈服務(wù)
- 硬件開發(fā)
- 華秋電路
- 華秋商城
- 華秋智造
- nextPCB
- BOM配單
- 媒體服務(wù)
- 網(wǎng)站廣告
- 在線研討會(huì)
- 活動(dòng)策劃
- 新聞發(fā)布
- 新品發(fā)布
- 小測(cè)驗(yàn)
- 設(shè)計(jì)大賽
- 華秋
- 關(guān)于我們
- 投資關(guān)系
- 新聞動(dòng)態(tài)
- 加入我們
- 聯(lián)系我們
- 舉報(bào)投訴
- 社交網(wǎng)絡(luò)
- 微博
- 移動(dòng)端
- 發(fā)燒友APP
- 硬聲APP
- WAP
- 聯(lián)系我們
- 廣告合作
- 王婉珠:wangwanzhu@elecfans.com
- 內(nèi)容合作
- 黃晶晶:huangjingjing@elecfans.com
- 內(nèi)容合作(海外)
- 張迎輝:mikezhang@elecfans.com
- 供應(yīng)鏈服務(wù) PCB/IC/PCBA
- 江良華:lanhu@huaqiu.com
- 投資合作
- 曾海銀:zenghaiyin@huaqiu.com
- 社區(qū)合作
- 劉勇:liuyong@huaqiu.com
-
關(guān)注我們的微信

-
下載發(fā)燒友APP

-
電子發(fā)燒友觀察


版權(quán)所有 ? 湖南華秋數(shù)字科技有限公司
長(zhǎng)沙市望城經(jīng)濟(jì)技術(shù)開發(fā)區(qū)航空路6號(hào)手機(jī)智能終端產(chǎn)業(yè)園2號(hào)廠房3層(0731-88081133)
電子發(fā)燒友 (電路圖) 湘公網(wǎng)安備43011202000918 工商網(wǎng)監(jiān)
湘ICP備2023018690號(hào)-1
工商網(wǎng)監(jiān)
湘ICP備2023018690號(hào)-1
評(píng)論