 產品測評:【HZHY-AI300G智能盒試用連載體驗】駐車輔助系統
繼上期電子發燒友用戶分享的HZHY-AI300G的測評之后,本期我們又迎來了一位新用戶的測評。測評內容如下:
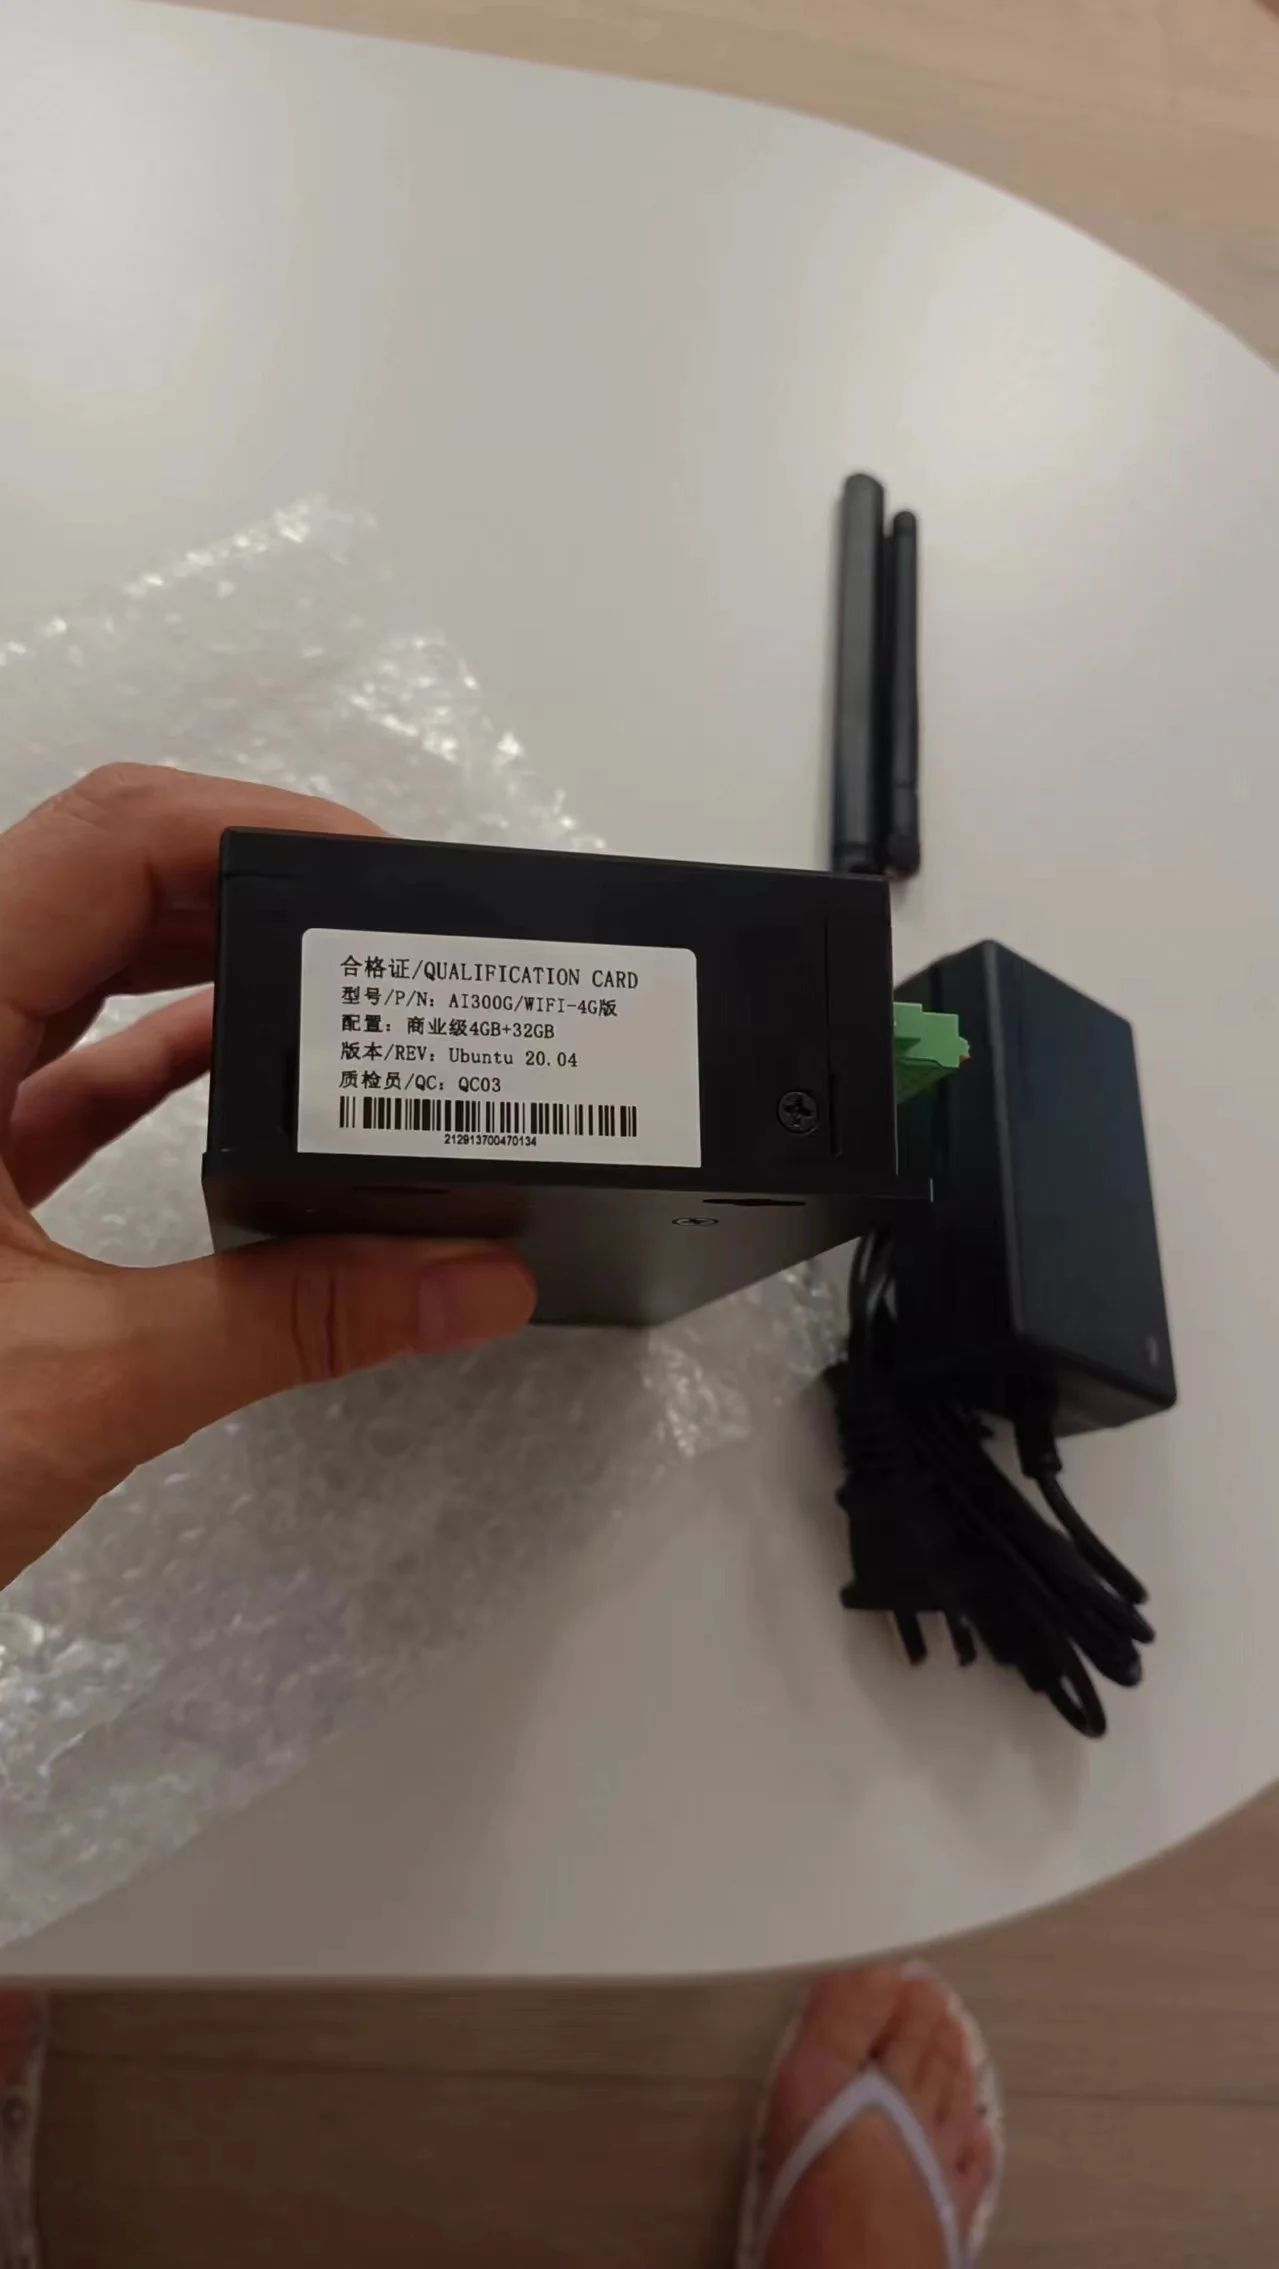
終于懷著激動的心情拿到了這塊專門為工業應用設計的RK3588智能盒。除了主機外,還附帶了兩根天線和一個電源。

我拿到的是4G+32G的版本。
在接下來的一個月中,我會深度評測這塊開發板,并用它完成一個完整的項目。項目分為以下幾個部分完成:
車窗智能防結冰;
后視鏡智能調整;
倒車雷達方案對比;
可視無線倒車雷達;
車窗自動關閉及防夾手功能;
自動駐車及自動取消功能。
車窗智能防結冰
要實現車窗智能防結冰,方法是對車內的溫度實時監控,當車內外溫差過大時啟動風扇讓空氣流通,降低溫差。
那么實現項目的本質就是,如何通過MCU檢測到溫度變化,并實現與HZHY-AI300G智能盒的雙向通訊,不但可以把溫度上報給HZHY-AI300G智能盒,同時當HZHY-AI300G智能盒下發通風指令時,MCU也可以正確執行。
我搭了一個簡單的電路來進行測試。其中使用BMP280作為溫度傳感器進行數據測量,而用一個小LED作為執行器,用來代表同風扇。MCU使用的是ESP32-S3開發板,開發環境方便起見使用的是Circuitpython。
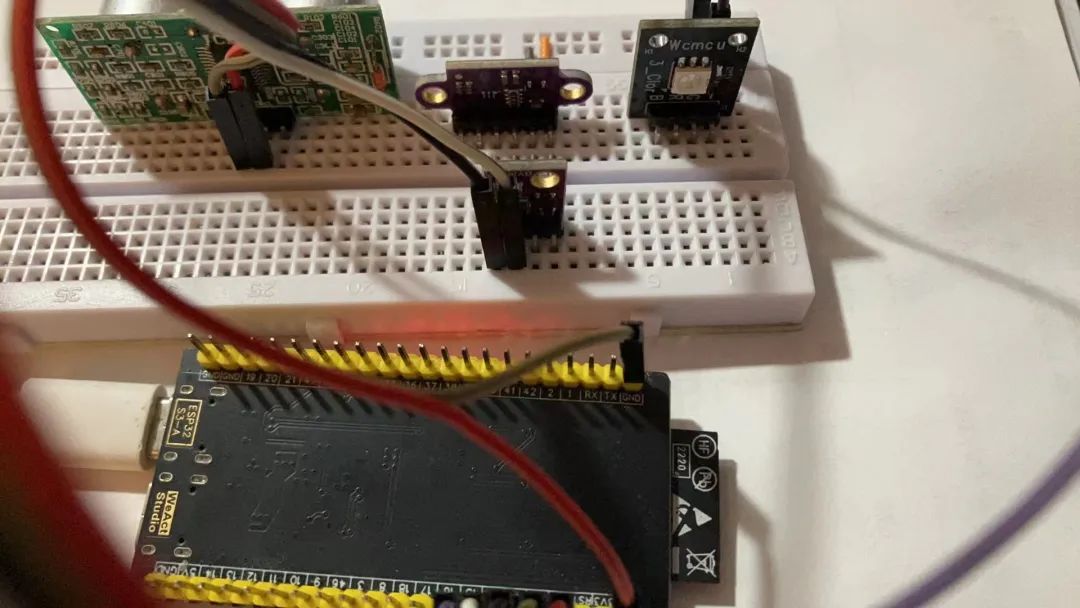
Circuitpython開發環境準備這一步我就直接跳過,因為和我們評測的HZHY-AI300G智能盒無關。
我們通過兩個MQTT Topic來進行通信。第一個Topic是test/topic,這個topic用來從mcu上報傳感器數據到HZHY-AI300G智能盒;另一個topic是test/cmd,用來讓HZHY-AI300G智能盒下發指令給MCU。
MCU的主要功能為,測量溫度并每秒鐘上報;如果接收到HZHY-AI300G智能盒下發的信息則按指令開關LED。具體代碼如下,注意要把MQTT broker的地址改為HZHY-AI300G智能盒的IP:
import time
import wifi
import socketpool
import ssl
import adafruit_minimqtt.adafruit_minimqtt as MQTT
import json
# Define callback methods which are called when events occur
def connect(client, userdata, flags, rc):
# This function will be called when the client is connected
# successfully to the broker.
print("Connected to MQTT Broker!")
print("Flags: {0}\\n RC: {1}".format(flags, rc))
def disconnect(client, userdata, rc):
# This method is called when the client disconnects
# from the broker.
print("Disconnected from MQTT Broker!")
def subscribe(client, userdata, topic, granted_qos):
# This method is called when the client subscribes to a new feed.
print("Subscribed to {0} with QOS level {1}".format(topic, granted_qos))
def unsubscribe(client, userdata, topic, pid):
# This method is called when the client unsubscribes from a feed.
print("Unsubscribed from {0} with PID {1}".format(topic, pid))
def publish(client, userdata, topic, pid):
# This method is called when the client publishes data to a feed.
print("Published to {0} with PID {1}".format(topic, pid))
def message(client, topic, message):
# This method is called when a topic the client is subscribed to
# has a new message.
print(f"New message on topic {topic}: {message}")
pool = socketpool.SocketPool(wifi.radio)
ssl_context = ssl.create_default_context()
# Set up a MiniMQTT Client
# NOTE: We'll need to connect insecurely for ethernet configurations.
mqtt_client = MQTT.MQTT(
broker="192.168.x.x",
port=1883,
username="",
password="",
is_ssl=False,
socket_pool=pool,
ssl_context=ssl_context,
# Connect callback handlers to client
mqtt_client.on_connect = connect
mqtt_client.on_disconnect = disconnect
mqtt_client.on_subscribe = subscribe
mqtt_client.on_unsubscribe = unsubscribe
mqtt_client.on_publish = publish
mqtt_client.on_message = message
def func():
pass
# MQTT Topic
# Use this topic if you'd like to connect to a standard MQTT broker
mqtt_topic = "test/topic"
print("Attempting to connect to %s" % mqtt_client.broker)
try:
mqtt_client.disconnect()
except:
pass
mqtt_client.connect()
# print("Subscribing to %s" % mqtt_topic)
# mqtt_client.subscribe(mqtt_topic)
# print("Publishing to %s" % mqtt_topic)
# mqtt_client.publish(mqtt_topic, "Hello Broker!")
# print("Unsubscribing from %s" % mqtt_topic)
# mqtt_client.unsubscribe(mqtt_topic)
# print("Disconnecting from %s" % mqtt_client.broker)
# mqtt_client.disconnect()
import board
import busio
i2c = busio.I2C(scl=board.GPIO7, sda=board.GPIO6)
assert i2c.try_lock()
print(i2c.scan())
i2c.unlock()
# 溫度測試
if 1:
import adafruit_bmp280
bmp280 = adafruit_bmp280.Adafruit_BMP280_I2C(i2c, address=0x76)
bmp280.sea_level_pressure = 1013.25
import digitalio
led = digitalio.DigitalInOut(board.GPIO15)
led.direction = digitalio.Direction.OUTPUT
led.value = True
mqtt_client.subscribe("test/cmd")
def func(client, topic, message):
led.value = int(message)
print(f"New message on topic {topic}: {message}")
mqtt_client.on_message = func
while True:
# Poll the message queue
mqtt_client.loop(timeout=1)
msg = {"Temperature": bmp280.temperature}
# Send a new message
mqtt_client.publish(mqtt_topic, json.dumps(msg))
print(msg)
time.sleep(1)
接線方式:
SCL: 7
SDA: 6
LED: 15
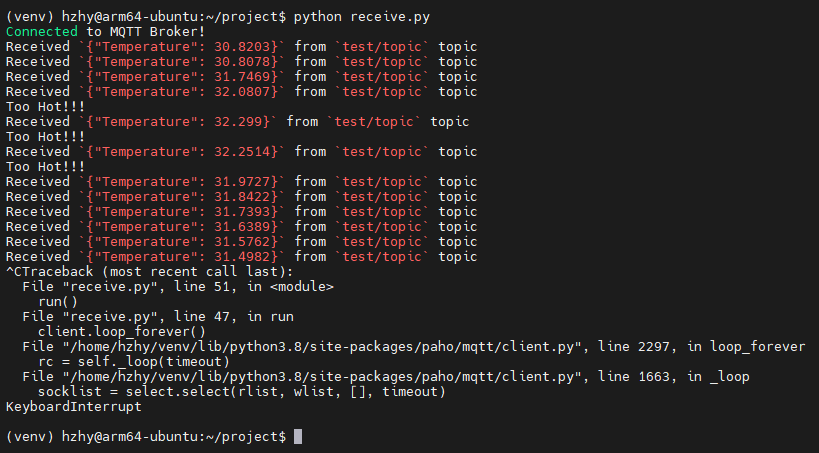
HZHY-AI300G智能盒的代碼我們可以基于上一篇MQTT測試代碼修改。兩邊信息傳遞使用的json文本,這是一種非常有效的指令及數據傳遞方式。代碼如下,如果檢測到上報的溫度大于31度,則會要求開啟LED,否則則熄滅LED。
from paho.mqtt import client as mqtt_client
import json
broker = '127.0.0.1'
port = 1883
topic = "test/topic"
client_id = "receiver"
# username = 'user'
# password = 'password'
def connect_mqtt():
def on_connect(client, userdata, flags, rc, properties):
if rc == 0:
print("Connected to MQTT Broker!")
else:
print("Failed to connect, return code %d\\n", rc)
# Set Connecting Client ID
client = mqtt_client.Client(client_id=client_id, callback_api_version=mqtt_client.CallbackAPIVersion.VERSION2)
# client.username_pw_set(username, password)
client.on_connect = on_connect
client.connect(broker, port)
return client
def subscribe(client: mqtt_client):
def on_message(client, userdata, msg):
print(f"Received `{msg.payload.decode()}` from `{msg.topic}` topic")
my_dict = json.loads(msg.payload.decode())
if 'Temperature' in my_dict:
temp = int(my_dict["Temperature"])
if temp > 31:
client.publish("test/cmd", "0")
print("Too Hot!!!")
else:
client.publish("test/cmd", "1")
client.subscribe(topic)
client.on_message = on_message
def run():
client = connect_mqtt()
subscribe(client)
client.loop_forever()
if __name__ == '__main__':
run()
同時運行兩邊的代碼,可以看到智能盒打印出了收到的溫度信息,當溫度高于31度時,打印對應文本,并點亮MCU上的LED。
后視鏡智能調整
接下來我們來看一下執行器的控制。譬如后視鏡調整,警報驅動,窗機啟停等功能,實際上都是HZHY-AI300G智能盒向MCU下發指令控制執行器的過程。
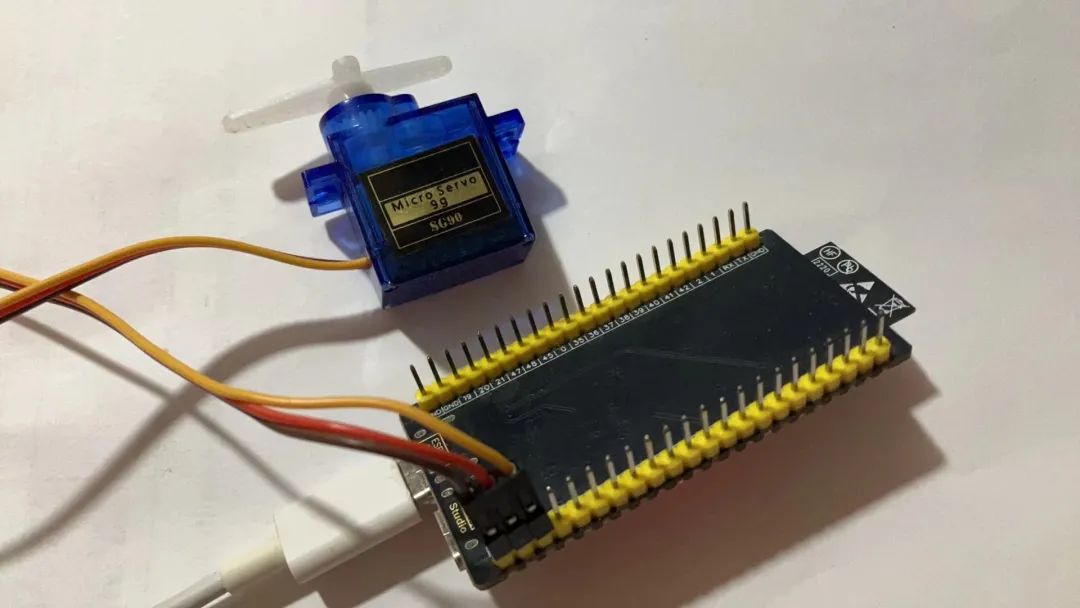
我們使用一個舵機作為執行器,依然先完成MCU部分的增量代碼。代碼內容非常簡單,把接收到的舵機角度直接傳遞給舵機即可。
# 舵機測試
if 1:
import pwmio
from adafruit_motor import servo
pwm = pwmio.PWMOut(board.GPIO14, frequency=50)
s1 = servo.Servo(pwm, min_pulse=500, max_pulse=2500)
mqtt_client.subscribe("test/cmd")
def func(client, topic, message):
print(f"New message on topic {topic}: {message}")
s1.angle = int(message)
msg = {"angle": int(message)}
mqtt_client.publish(mqtt_topic, json.dumps(msg))
mqtt_client.on_message = func
while True:
# Poll the message queue
mqtt_client.loop(timeout=1)
舵機記得要使用5V供電,接在14號引腳上。
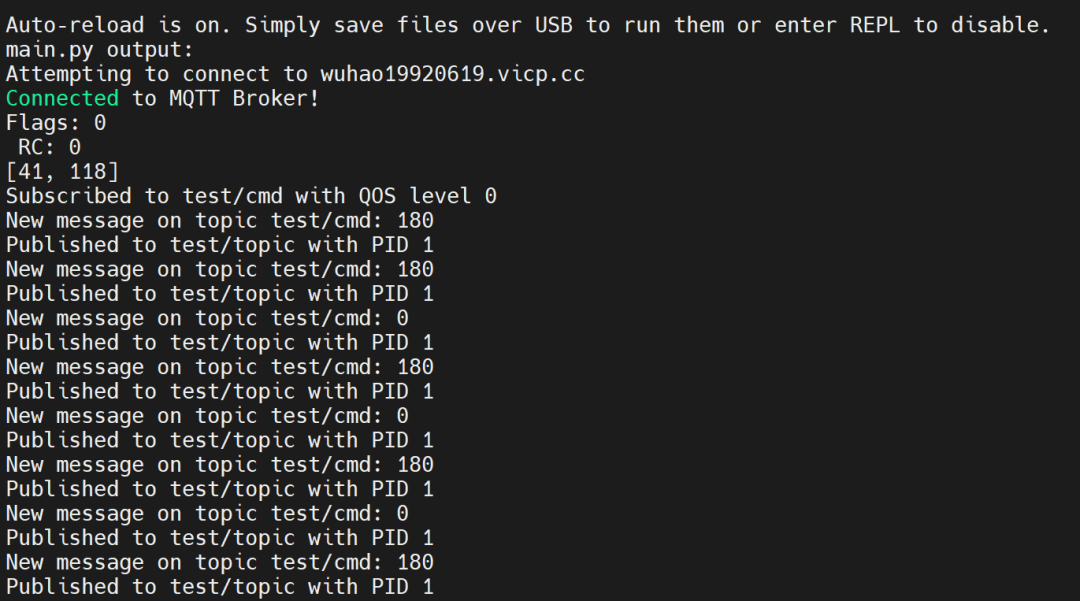
HZHY-AI300G智能盒由于是單純的下發指令,因此這次代碼我們可以基于一開始的發送代碼進行修改。出于測試目的,我們讓HZHY-AI300G智能盒下發每間隔1S旋轉舵機180度的指令:
import time
from paho.mqtt import client as mqtt_client
broker = '127.0.0.1'
port = 1883
topic = "test/topic"
client_id = "sender"
# username = 'user'
# password = 'password'
def connect_mqtt():
def on_connect(client, userdata, flags, rc, properties):
if rc == 0:
print("Connected to MQTT Broker!")
else:
print("Failed to connect, return code %d\\n", rc)
# Set Connecting Client ID
client = mqtt_client.Client(client_id=client_id, callback_api_version=mqtt_client.CallbackAPIVersion.VERSION2)
# client.username_pw_set(username, password)
client.on_connect = on_connect
client.connect(broker, port)
return client
def publish(client):
msg_count = 0
while True:
time.sleep(1)
msg = f"messages: {msg_count}"
result = client.publish(topic, msg)
# result: [0, 1]
status = result[0]
if status == 0:
print(f"Send `{msg}` to topic `{topic}`")
else:
print(f"Failed to send message to topic {topic}")
msg_count += 1
def run():
client = connect_mqtt()
# client.loop_start()
# publish(client)
# client.loop_stop()
# 舵機測試
if 1:
while True:
client.publish("test/cmd", "0")
time.sleep(1)
client.publish("test/cmd", "180")
time.sleep(1)
if __name__ == '__main__':
run()
兩邊代碼同時運行,我們就可以觀察到舵機按照要求運動起來。觀察MCU的控制臺輸出,可以看到打印出了接收到的數據信息:
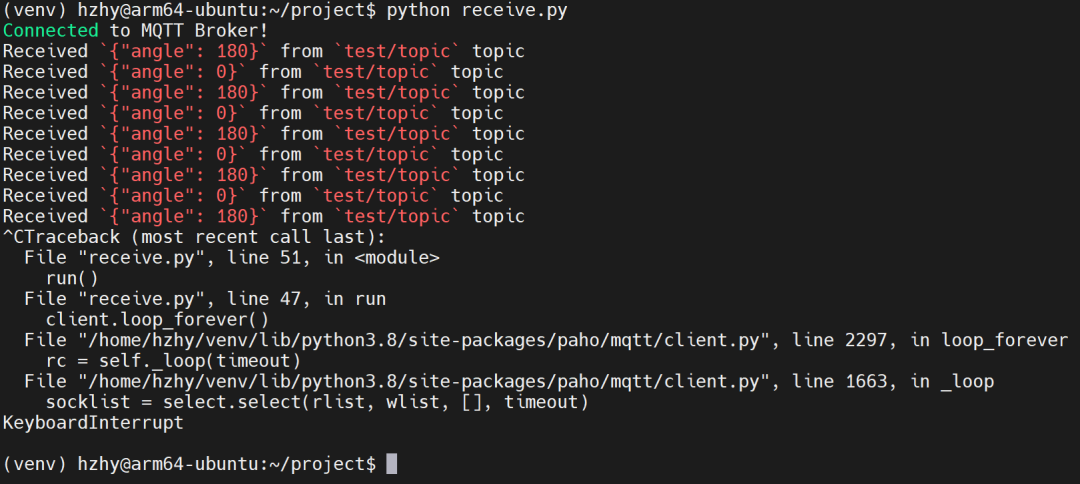
而如果我們同步運行HZHY-AI300G智能盒上的接收代碼,也可以看到對應的反饋信息:
倒車雷達方案對比
倒車雷達兩種方案的驗證,同樣也是使用MCU獲取兩個傳感器得到的信號,并把數據一起上報給HZHY-AI300G智能盒。
MCU的代碼可以基于之前的代碼上做增量修改,因為MQTT通訊部份都是一樣的。增加如下部分就可以實現讀取兩個距離傳感器的數據,并上報給HZHY-AI300G智能盒:
# 測距測試
if 0:
import adafruit_vl53l0x
vl53 = adafruit_vl53l0x.VL53L0X(i2c)
import adafruit_us100
# Connect TX to TX, RX to RX
uart = busio.UART(board.GPIO4, board.GPIO5, baudrate=9600)
sonar = adafruit_us100.US100(uart)
while True:
# Poll the message queue
mqtt_client.loop(timeout=1)
msg = {"vl53l0x": vl53.range, "sonar": int(sonar.distance * 10)}
# Send a new message
mqtt_client.publish(mqtt_topic, json.dumps(msg))
print(msg)
time.sleep(1)
HZHY-AI300G智能盒部分的代碼可以不用做修改。兩邊同時運行,我們可以看到HZHY-AI300G智能盒有如下輸出:
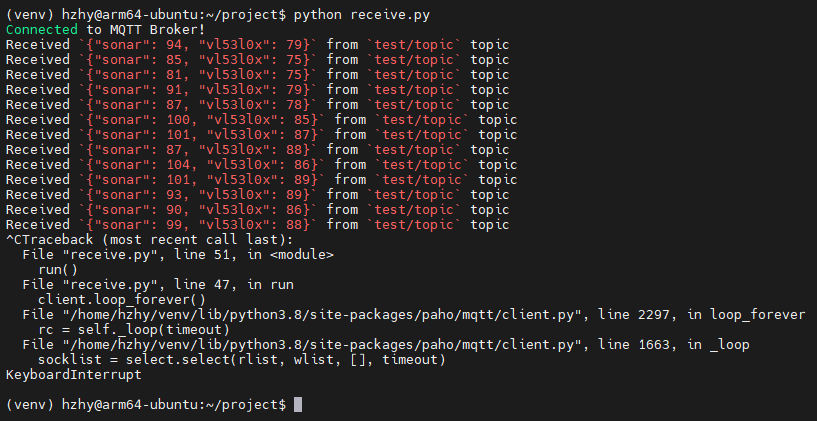
兩個傳感器都可以測量距離,但是原理不同。一個是基于超聲波,使用聲納的方式來測距;另外一個是基于激光,測量方式也和聲納類似,但在激光上被叫做TOF。
兩者很難說優略,與其說是替代的關系,不如說是互補的關系。因為激光波長遠小于超聲波,因此超聲波測量范圍會比較大,但是精度稍低;而激光精度會高一些,但是范圍比較小。因此兩種傳感器搭配使用的話會獲得更好的結果。
我們誠摯感謝這位發燒友對HZHY-AI300G智能盒的熱情支持和積極反饋。內容會持續更新,歡迎大家前往發燒友平臺查看。若您也愿意分享使用體驗,請在平臺上發布,我們將贈送一份精美禮品,以表謝意!
-
輔助系統
+關注
關注
0文章
72瀏覽量
11802 -
駐車輔助
+關注
關注
0文章
2瀏覽量
7483 -
智能盒子
+關注
關注
0文章
20瀏覽量
3204 -
RK3588
+關注
關注
7文章
409瀏覽量
5654
發布評論請先 登錄
【新品體育】HZHY-AI300G智能盒免費試用
【HZHY-AI300G智能盒試用連載體驗】+ 具有 Local AI 功能的工業用照明控制器
【HZHY-AI300G智能盒試用連載體驗】+ 智能工業互聯網網關
【HZHY-AI300G智能盒試用連載體驗】基建智慧工地物聯邊緣代理技術研究及應用
【HZHY-AI300G智能盒試用連載體驗】駐車輔助系統
【社區工程師專題系列第七期】沒有興趣推動是不會有成就的——李海
電子駐車系統的功能/特點/參數
產品測評:【HZHY-AI300G智能盒試用體驗】+ 具有 Local AI 功能的工業用照明控制器

案例分享 | 探索HZHY-AI300G工業智能盒:從硬件接口到云端集成的全方位應用
產品測評:基于RK3588工業級芯片,構建智能工業互聯網網關
HZHY-AI100G:適配鴻蒙系統的AI邊緣計算智能盒
案例分享 ▏合眾恒躍HZHY-AI300G智盒搭載RK3588,適配國產銀河麒麟操作系統
案例分享 ▏【瑞芯微RK3588】HZHY-AI300G智能盒部署DeepSeek-R1模型實戰指南


 工商網監
工商網監
評論