 使用Arduino測量舵機扭矩的過程分享
在日常生活中,我們經常會看到一些產品的技術參數,這些參數與實際使用數據都會存在一些差距,但它也是用戶選擇產品的重要參考。比如智能手機制造商會宣稱他們的電池使用壽命如何長,科技公司會宣稱他們的科技產品是最具科技含量,而汽車公司則吹噓自己汽車的燃油經濟性如何好,其實這些數據有相當部分是存在虛標的。
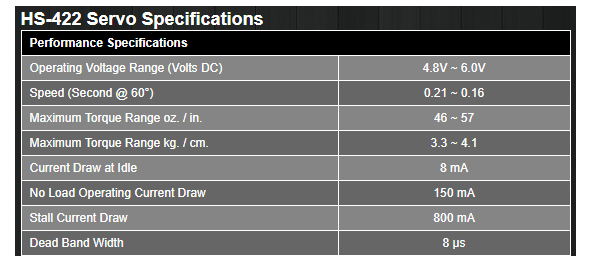
我們經常使用的舵機也不例外,舵機制造商也會對他們生產的舵機給出各種各樣的技術參數,其中諸如電機能夠產生的扭矩等。如下圖,HS-422舵機的技術參數
在這個項目中,我們將建立一個測量舵機扭矩范圍的工具,目的是驗證舵機實際產生的扭矩與技術參數中所標稱的扭矩是否相符。整個實驗會用到一個測力量的部件,一個Arduino Uno,一個3D打印的舵機框架,和其他一些部件,然后測量舵機實際產生的扭矩。
實驗器件清單
Arduino Uno
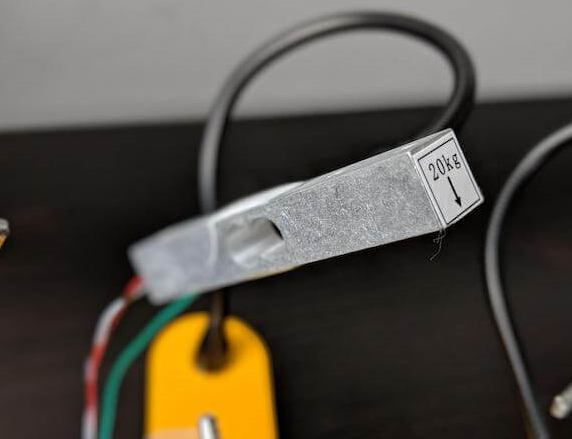
20kg測壓桿
HX711稱重傳感器模塊
面包板電源
面包板
跳線
M4×6mm螺絲
M4嵌入式螺母
如何測量舵機的扭矩
力矩是通過力與距離的乘積來計算得出的。在這個項目中,要獲得舵機的力會有些困難,因此,需要使用一個負載單元。在設計和使用測壓元件時會涉及到許多復雜的細節,但在本項目中,測壓元件是一種傳感器,它允許計算機將微小的電壓變化轉化為力的形式呈現出來。使用測力元件,我們就能夠測量舵機的旋轉軸和舵機臂之間的精確距離。
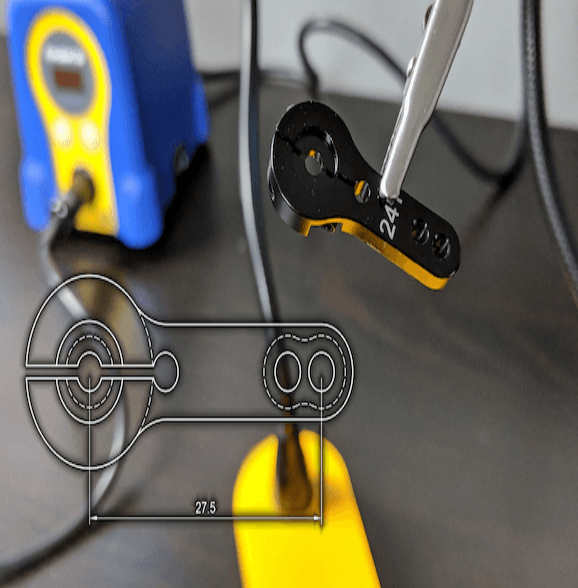
當舵機開始旋轉時,它就會對測壓元件產生推力,結合測壓元件受到的測力以及旋轉軸和伺服臂的距離,就可以計算出由測力元件傳遞的扭矩。
構建測試工具
測試工具的機械結構比較簡單,它由兩個3D打印零件和幾個緊固件組成。你可以下載本文附帶的3D打印部件的設計文件(提取碼:9t4e)。

3D打印件沒有特殊的要求,所以使用任何材料打印都可以。
裝配測試工具
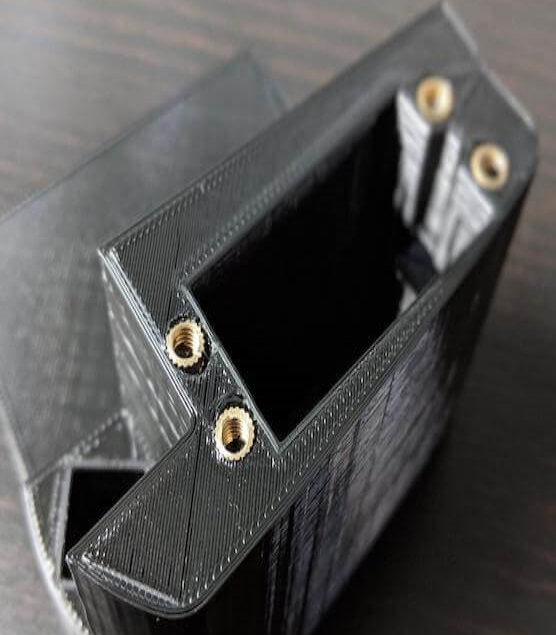
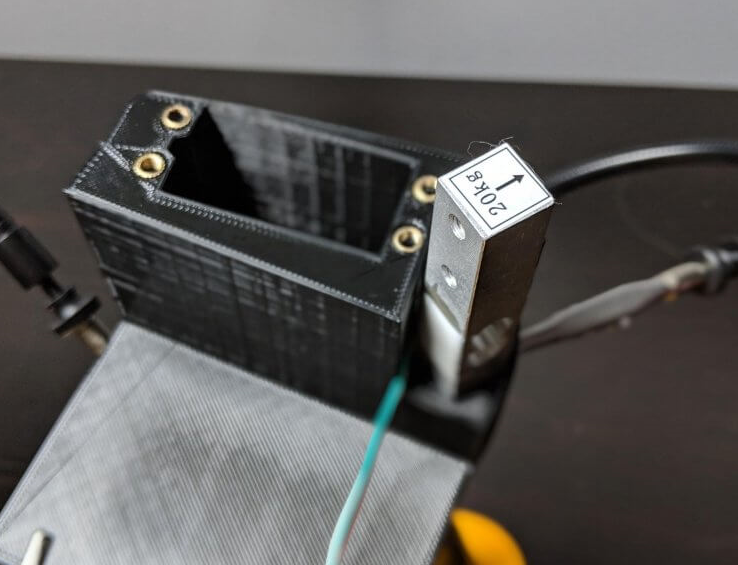
裝配舵機扭矩測量工具的第一步是安裝嵌入式螺母,嵌入式螺母可以使安裝更安全,不會損壞3D打印框架。安裝螺母時,可以輕輕將其按下插入塑料孔后,使用烙鐵對其加熱,當你移開烙鐵后,熔化的塑料會在鑲件周圍凝固,形成非常牢固的連接,這樣就可以完成安裝了。
接下來,安裝測壓元件,其一側有一個綠色箭頭。將測壓元件朝上,箭頭指向遠離舵機的方向,然后將測壓元件插入旁邊的正方形中。測壓元件應該保持穩固,確保安裝過程中沒有搖晃的空隙。
然后,在面包板背面貼一塊雙面膠,把它粘在3D打印的框架上。
完成了框架搭建,余下的就是電路的搭建了,請看下面的電路圖。
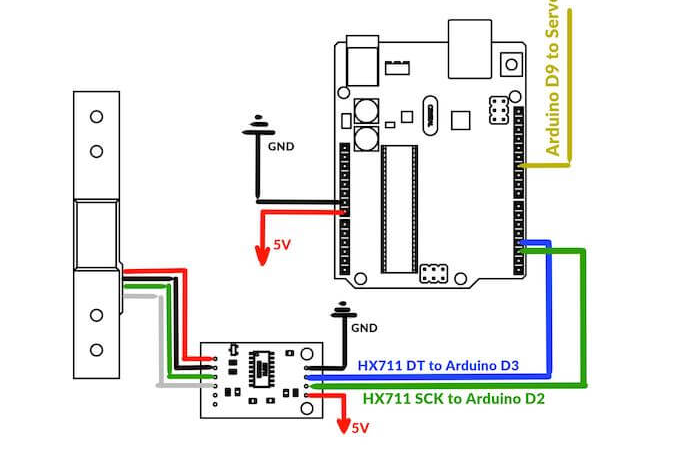
電源連接:
Arduino GND -》 面包板 GND
HX711 GND -》 面包板 GND
舵機 黑線 -》 Arduino GND
Arduino Vin -》 面包板 VCC
HX711 VCC -》 面包板 VCC
舵機 紅線 -》 Arduino 5V
信號連接:
舵機 黃線 -》 Arduino D9
HX711 DT針 -》 Arduino D3
HX711 SCK針 -》 Arduino D2
測壓元件連接:
測壓元件紅線 -》 HX711 E+針
測壓元件黑線 -》 HX711 E-針
測壓元件綠線 -》 HX711 A-針
測壓元件白線 -》 HX711 A+針
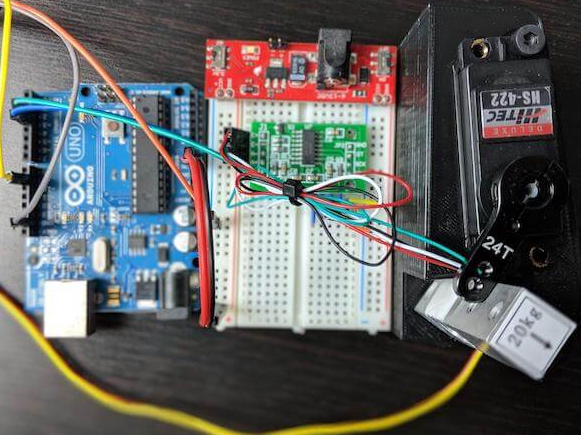
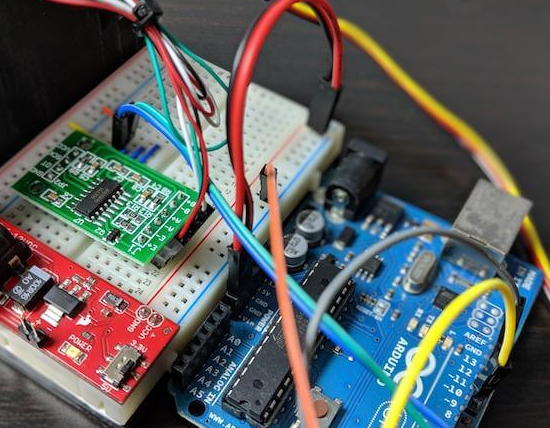
完成組裝的成品圖
/*
Project: Measuring Servo Torque
Author: Toglefritz
This project involves a simple device used to measure the torque output of a hobby-scale servo. The device consists of a 3D printed frame that will hold a servo and a load cell. The servo rotates a horn into the load cell, producing a reading from the load cell. From the known distance between the servo's center of rotation and the load cell, the servo's torque can be calculated from the force on the load cell.
Complete documentation for the project can be found on Maker Pro.
*/
// Include libraries for interfacing with the HX711 and the servo
#include "HX711.h"
#include
// Configuration
#define calibration_factor -7050.0 // This value is obtained using the HX711_Calibration sketch
int trialRuns = 5; // This defines the number of times to measure the servo's force on the
// load cell. These measurments will be averaged to come up with a single reading.
float armLength = 2.75; // This is the distance (in cm) between the servo's center of rotation and the load cell.
// This is based on the mechanical design of the test fixture.
// Define connections between the HX711 and the Arduino
#define DT 3 // The HX711 DT pin connects to D3 on the Arduino
#define SCK 2 // The HX711 SCK pin connects to D2 on the Arduino
// Initialize the HX711
HX711 loadCell(DT, SCK);
// Create a servo object
Servo testServo;
void setup() {
// Begin Serial communication
Serial.begin(9600);
Serial.println(" - Torque Measurement Tool - "); // Print a heading
Serial.println();
// Set the pin used to control the servo
testServo.attach(9);
loadCell.set_scale(calibration_factor); // This value is obtained by using the HX711_Calibration sketch
loadCell.tare(); // Reset the scale to zero to compensate for any existing load
// To begin the test, the servo horn should be attached so that it is making contact with
// the load cell at an angle of 140 degrees on the servo
testServo.write(140); // Move the servo into the load cell
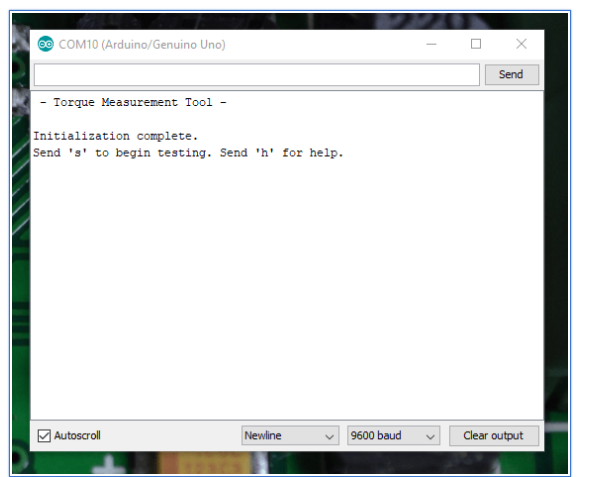
Serial.println("Initialization complete.");
Serial.println("Send 's' to begin testing. Send 'h' for help.");
Serial.println();
}
void loop() {
// If the user sends 's' over Serial, begin testing the torque
if(Serial.read() == 's' || Serial.read() == 'S') {
measureTorque();
}
// If the user sends 'i' over Serial, show some instructions
if(Serial.read() == 'h' || Serial.read() == 'h') {
Serial.println("Right now, the Arduino has moved the servo into its starting position.");
Serial.println("In the servo's current position, install the horn so that it is just touching the load cell.");
Serial.println("When you are ready, send 's' over Serial and the Arduino will begin testing the servo's torque.");
Serial.println("You will see the Arduino move the servo into the load cell five different times.");
Serial.println("Each time the servo hits the load cell, the Arduino will take a reading.");
Serial.println("Those readings will be averaged to calculate the torque delivered by the servo.");
Serial.println("Keep an eye on the Serial monitor to see the results.");
Serial.println();
Serial.println("Send 's' to begin testing.");
Serial.println();
}
}
void measureTorque() {
/*
To test the servo's torque, the Arduino will move the servo arm so that it presses on the load
cell. The resulting force will produce a reading from the load cell. The Arduino will take
five readings to compute an average force value. Because the distance between the servo's
center of rotation and the load cell is known from the frame design, the Arduino
can calculate the torque produced by the servo.
*/
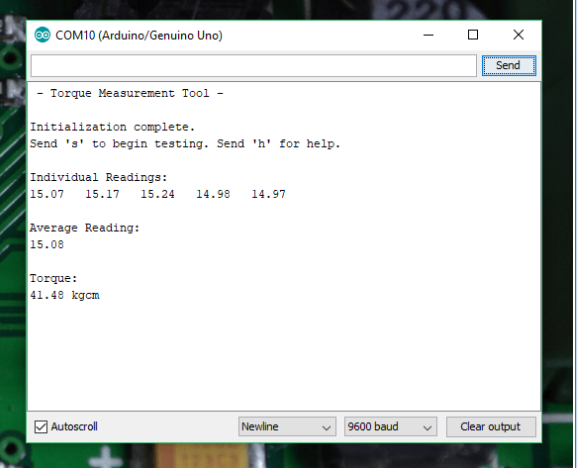
Serial.println("Individual Readings: ");
float individualReadings[trialRuns]; // This array will store the load cell readings for the five tests
for(int i = 0; i < 5; i++) {
testServo.write(180); // Move the servo away from the load cell
delay(1000); // Wait for the servo to move
loadCell.tare(); // Reset the scale to zero to compensate for any existing load
testServo.write(130); // Move the servo into the load cell. A 130 degree angle is actually inside the load
// cell, so the servo will be pushing towards that position, exerting force on
// the load cell.
delay(1000); // Wait for the servo to move
individualReadings[i] = loadCell.get_units(); // Take a measurment from the load cell
Serial.print(individualReadings[i]); // Print the measurment over Serial
Serial.print(" ");
}
// Now that we have five individual readings, average them to get one average load reading
float readingsSum = 0; // Create a variable to store the sum of all readings
// Loop through the array and add together all the readings
for(int y = 0; y < trialRuns; y++) {
readingsSum = readingsSum + individualReadings[y];
}
float averageReading = readingsSum / trialRuns; // Divide by the numer of readings to get the average
Serial.println();
Serial.println();
Serial.println("Average Reading:"); // Print the average reading over Serial
Serial.println(averageReading);
// From the average reading, calculate the torque delivered by the servo
// using the formula T = F * r where T is the torque, F is the load cell
// reading (a force), and r is the radius of rotation (the distance between
// the servo and the load cell).
// The units for the torque will be kg*cm
float servoTorque = averageReading * armLength; // Calculate the torque
Serial.println();
Serial.println("Torque:"); // Print the torque
Serial.print(servoTorque);
Serial.println(" kgcm");
testServo.write(180); // Move the servo away from the load cell after the testing is complete
}
系統啟動后,將會打開一個串口監視器,當我們準備開始測量時,系統將提示你通過串口發送“s”開始。
Arduino將測量這個舵機產生的力,并將它轉換成扭矩,最后將結果發送給串口監視器上。
-
Arduino
+關注
關注
189文章
6492瀏覽量
190161
發布評論請先 登錄
Arduino如何利用紅外感應控制舵機
機器人舵機調試系統
arduino如何驅動ST90S微型舵機
盤點電機扭矩的測量方法有哪些
arduino如何控制舵機及詳細步驟
通過Arduino控制舵機


 工商網監
工商網監
評論