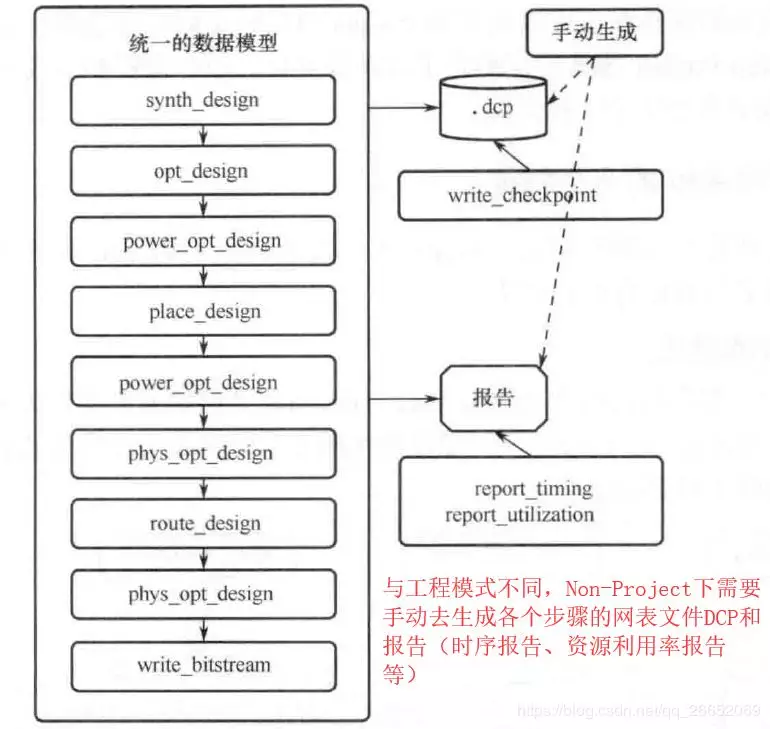
vivado有project模式和non-project模式,project模式就是我們常用的方式,在vivado里面新建工程,通過GUI界面去操作;non-project模式就是純粹通過tcl來指定vivado的流程、參數。
相比于project模式,non-project模式的優勢如下:
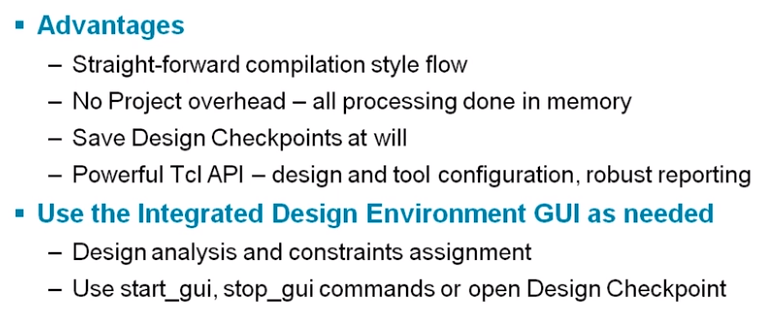
總結下來就是,不僅節省空間,還更加靈活。
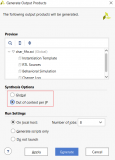
下面我們以vivado中自帶的wavegen工程為例:
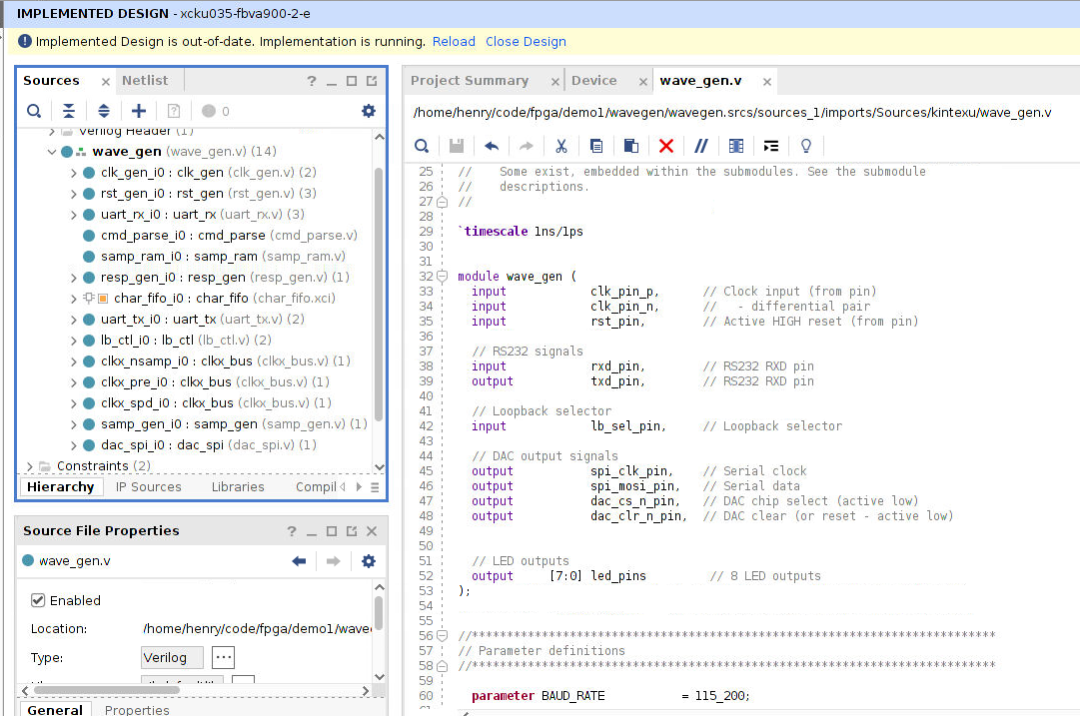
image-20221015225402004
為了更加快捷的完成non-project的tcl內容,我們可以先把wavegen工程進行Synthsis和Implementation,在wavegen.runs下面會生成synth_1和impl_1的兩個目錄,這兩個目錄都有wavegen.tcl,我們可以直接將里面的有用內容copy出來,用來創建non-project的tcl,具體操作就不展開細講了,直接把最終的tcl文件展示出來,就很很容易理解了:
#========================================================//
#FileName:build.tcl
#Author:ZhangHaijun
#Version:v1.0
#Discription:vivado-modebatch-sourcebuild.tcl
#========================================================//
#!/usr/bin/tclsh
set_paramgeneral.maxthreads8
set_partxcku035-fbva900-2-e
#readfiles
read_verilog/home/henry/fpga/wavegen/wavegen.srcs/sources_1/imports/Sources/clogb2.vh
read_verilog-libraryxil_defaultlib{
/home/henry/fpga/wavegen/wavegen.srcs/sources_1/imports/Sources/kintexu/clk_div.v
/home/henry/fpga/wavegen/wavegen.srcs/sources_1/imports/Sources/kintexu/clk_gen.v
/home/henry/fpga/wavegen/wavegen.srcs/sources_1/imports/Sources/kintexu/clkx_bus.v
/home/henry/fpga/wavegen/wavegen.srcs/sources_1/imports/Sources/kintexu/cmd_parse.v
/home/henry/fpga/wavegen/wavegen.srcs/sources_1/imports/Sources/kintexu/dac_spi.v
/home/henry/fpga/wavegen/wavegen.srcs/sources_1/imports/Sources/kintexu/debouncer.v
/home/henry/fpga/wavegen/wavegen.srcs/sources_1/imports/Sources/kintexu/lb_ctl.v
/home/henry/fpga/wavegen/wavegen.srcs/sources_1/imports/Sources/kintexu/meta_harden.v
/home/henry/fpga/wavegen/wavegen.srcs/sources_1/imports/Sources/kintexu/out_ddr_flop.v
/home/henry/fpga/wavegen/wavegen.srcs/sources_1/imports/Sources/kintexu/reset_bridge.v
/home/henry/fpga/wavegen/wavegen.srcs/sources_1/imports/Sources/kintexu/resp_gen.v
/home/henry/fpga/wavegen/wavegen.srcs/sources_1/imports/Sources/kintexu/rst_gen.v
/home/henry/fpga/wavegen/wavegen.srcs/sources_1/imports/Sources/kintexu/samp_gen.v
/home/henry/fpga/wavegen/wavegen.srcs/sources_1/imports/Sources/kintexu/samp_ram.v
/home/henry/fpga/wavegen/wavegen.srcs/sources_1/imports/Sources/kintexu/to_bcd.v
/home/henry/fpga/wavegen/wavegen.srcs/sources_1/imports/Sources/kintexu/uart_baud_gen.v
/home/henry/fpga/wavegen/wavegen.srcs/sources_1/imports/Sources/kintexu/uart_rx.v
/home/henry/fpga/wavegen/wavegen.srcs/sources_1/imports/Sources/kintexu/uart_rx_ctl.v
/home/henry/fpga/wavegen/wavegen.srcs/sources_1/imports/Sources/kintexu/uart_tx.v
/home/henry/fpga/wavegen/wavegen.srcs/sources_1/imports/Sources/kintexu/uart_tx_ctl.v
/home/henry/fpga/wavegen/wavegen.srcs/sources_1/imports/Sources/kintexu/wave_gen.v
}
#readip
read_ip-quiet/home/henry/fpga/wavegen/wavegen.srcs/sources_1/ip/clk_core/clk_core.xci
read_ip-quiet/home/henry/fpga/wavegen/wavegen.srcs/sources_1/ip/char_fifo/char_fifo.xci
#readconstraints
read_xdc/home/henry/fpga/wavegen/wavegen.srcs/constrs_1/imports/xcku035-fbva900-2-e/wave_gen_timing.xdc
read_xdc/home/henry/fpga/wavegen/wavegen.srcs/constrs_1/imports/xcku035-fbva900-2-e/wave_gen_pins.xdc
#generateips
generate_targetall[get_ips]
#synthesizedesign
synth_design-topwave_gen-partxcku035-fbva900-2-e
write_checkpoint-force-noxdefsynth.dcp
#opt_design
opt_design
write_checkpoint-forceopt.dcp
#placedesign
place_design
write_checkpoint-forceplaced.dcp
phys_opt_design
write_checkpoint-forcephysopt.dcp
#routedesign
route_design
write_checkpoint-forcerouted.dcp
report_timing_summary-max_paths10-report_unconstrained-filewave_gen_timing_summary_routed.rpt-pbwave_gen_timing_summary_routed.pb-rpxwave_gen_timing_summary_routed.rpx-warn_on_violation
#writebitfile
write_bitstream-force./wave_gen.bit
對于綜合時間上,理論上non-project模式要比project模式快一些,因為project模式會把每一步的結果都寫入到磁盤中,但non-project中,我們只需要把我們想需要的文件存下來。
在上面的腳本中,也基本上把每一步的結果都存了下來,而且本身Synthsis和Implement的時間也不到2分鐘,所以跟project模式的時間并沒有明顯差別。
審核編輯:湯梓紅
-
project
+關注
關注
0文章
35瀏覽量
13482 -
Vivado
+關注
關注
19文章
834瀏覽量
68534
原文標題:Vivado non-project模式示例
文章出處:【微信號:傅里葉的貓,微信公眾號:傅里葉的貓】歡迎添加關注!文章轉載請注明出處。
發布評論請先 登錄
系統級設計輸入
怎么將Vivado項目轉換為ISE項目
Vivado 2017.2關閉
VIVADO從此開始高亞軍編著
Vivado設計流程指導手冊
Vivado Synthesis中如何為Verilog代碼中的“include file”設置路徑?
關于Vivado 2019.1的Dashboard功能詳解

基于Project模式Vivado GUI使用的配置文件自動化生成管理

Vivado設計流程指導手冊


 關于Vivado non-project模式




評論